
Part 1. Guita - Learning Guitar by Ear
Table of Contents
- Guita - Learning Guitar by Ear
- Persona Setting
- Learning Guitar with Eyes Closed
- Planning and Implementation
- Sound recognition function implementation
- Accessibility
- Demonstration
- Finishing
Introducing Guita, a guitar learning app for the visually impaired.
👉 한국어 버전
✔︎ Part 1. Guita - Guitar Learning App for the Visually Impaired
Part 2. Guita - Guitar Tuner for the Visually Impaired
Guita - Learning Guitar by Ear
A guitar learning app that can be learned without sight
👉 App Store
Guita is an iOS project conducted for 5 weeks with the 4th Apple Developer Academy team members. It was planned to break down the learning barriers for the visually impaired.
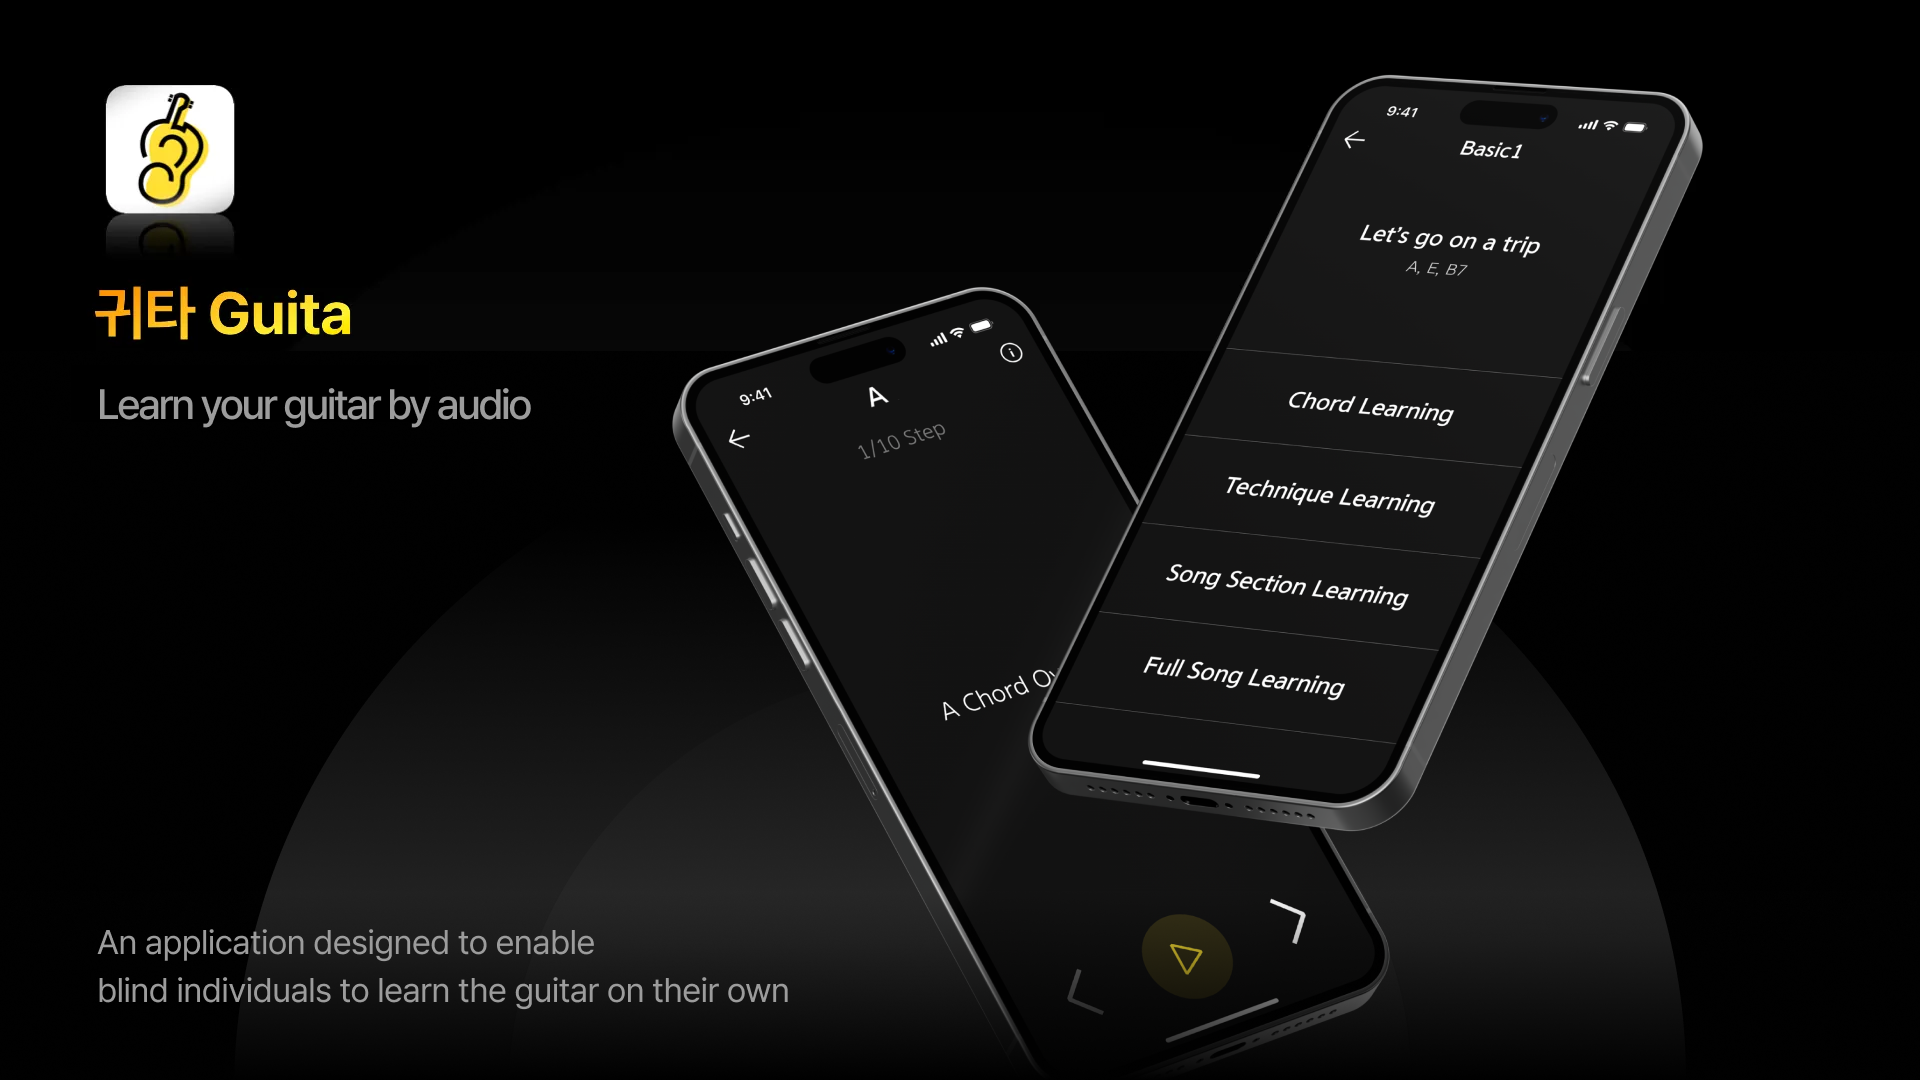 Guita, a guitar learning app for the visually impaired
Persona Setting
The core of this project was to make an ‘app for just one person.’ We decided to produce an app for Mr. Ha in his 50s, who became totally blind later in life. We visited him in person, talked for a long time, and began to understand his daily life and needs one by one.
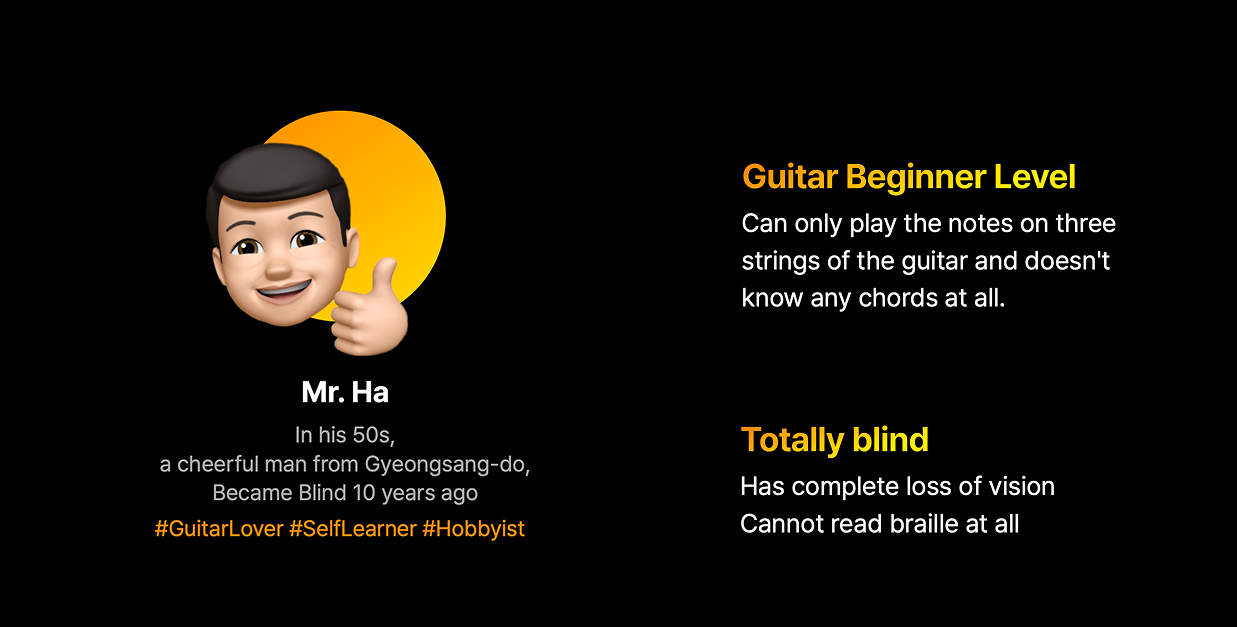 Persona
Mr. Ha enjoys playing the guitar as a hobby. He has the skill to play the melodies of trot songs on the guitar, but we found that he was unable to play chords.
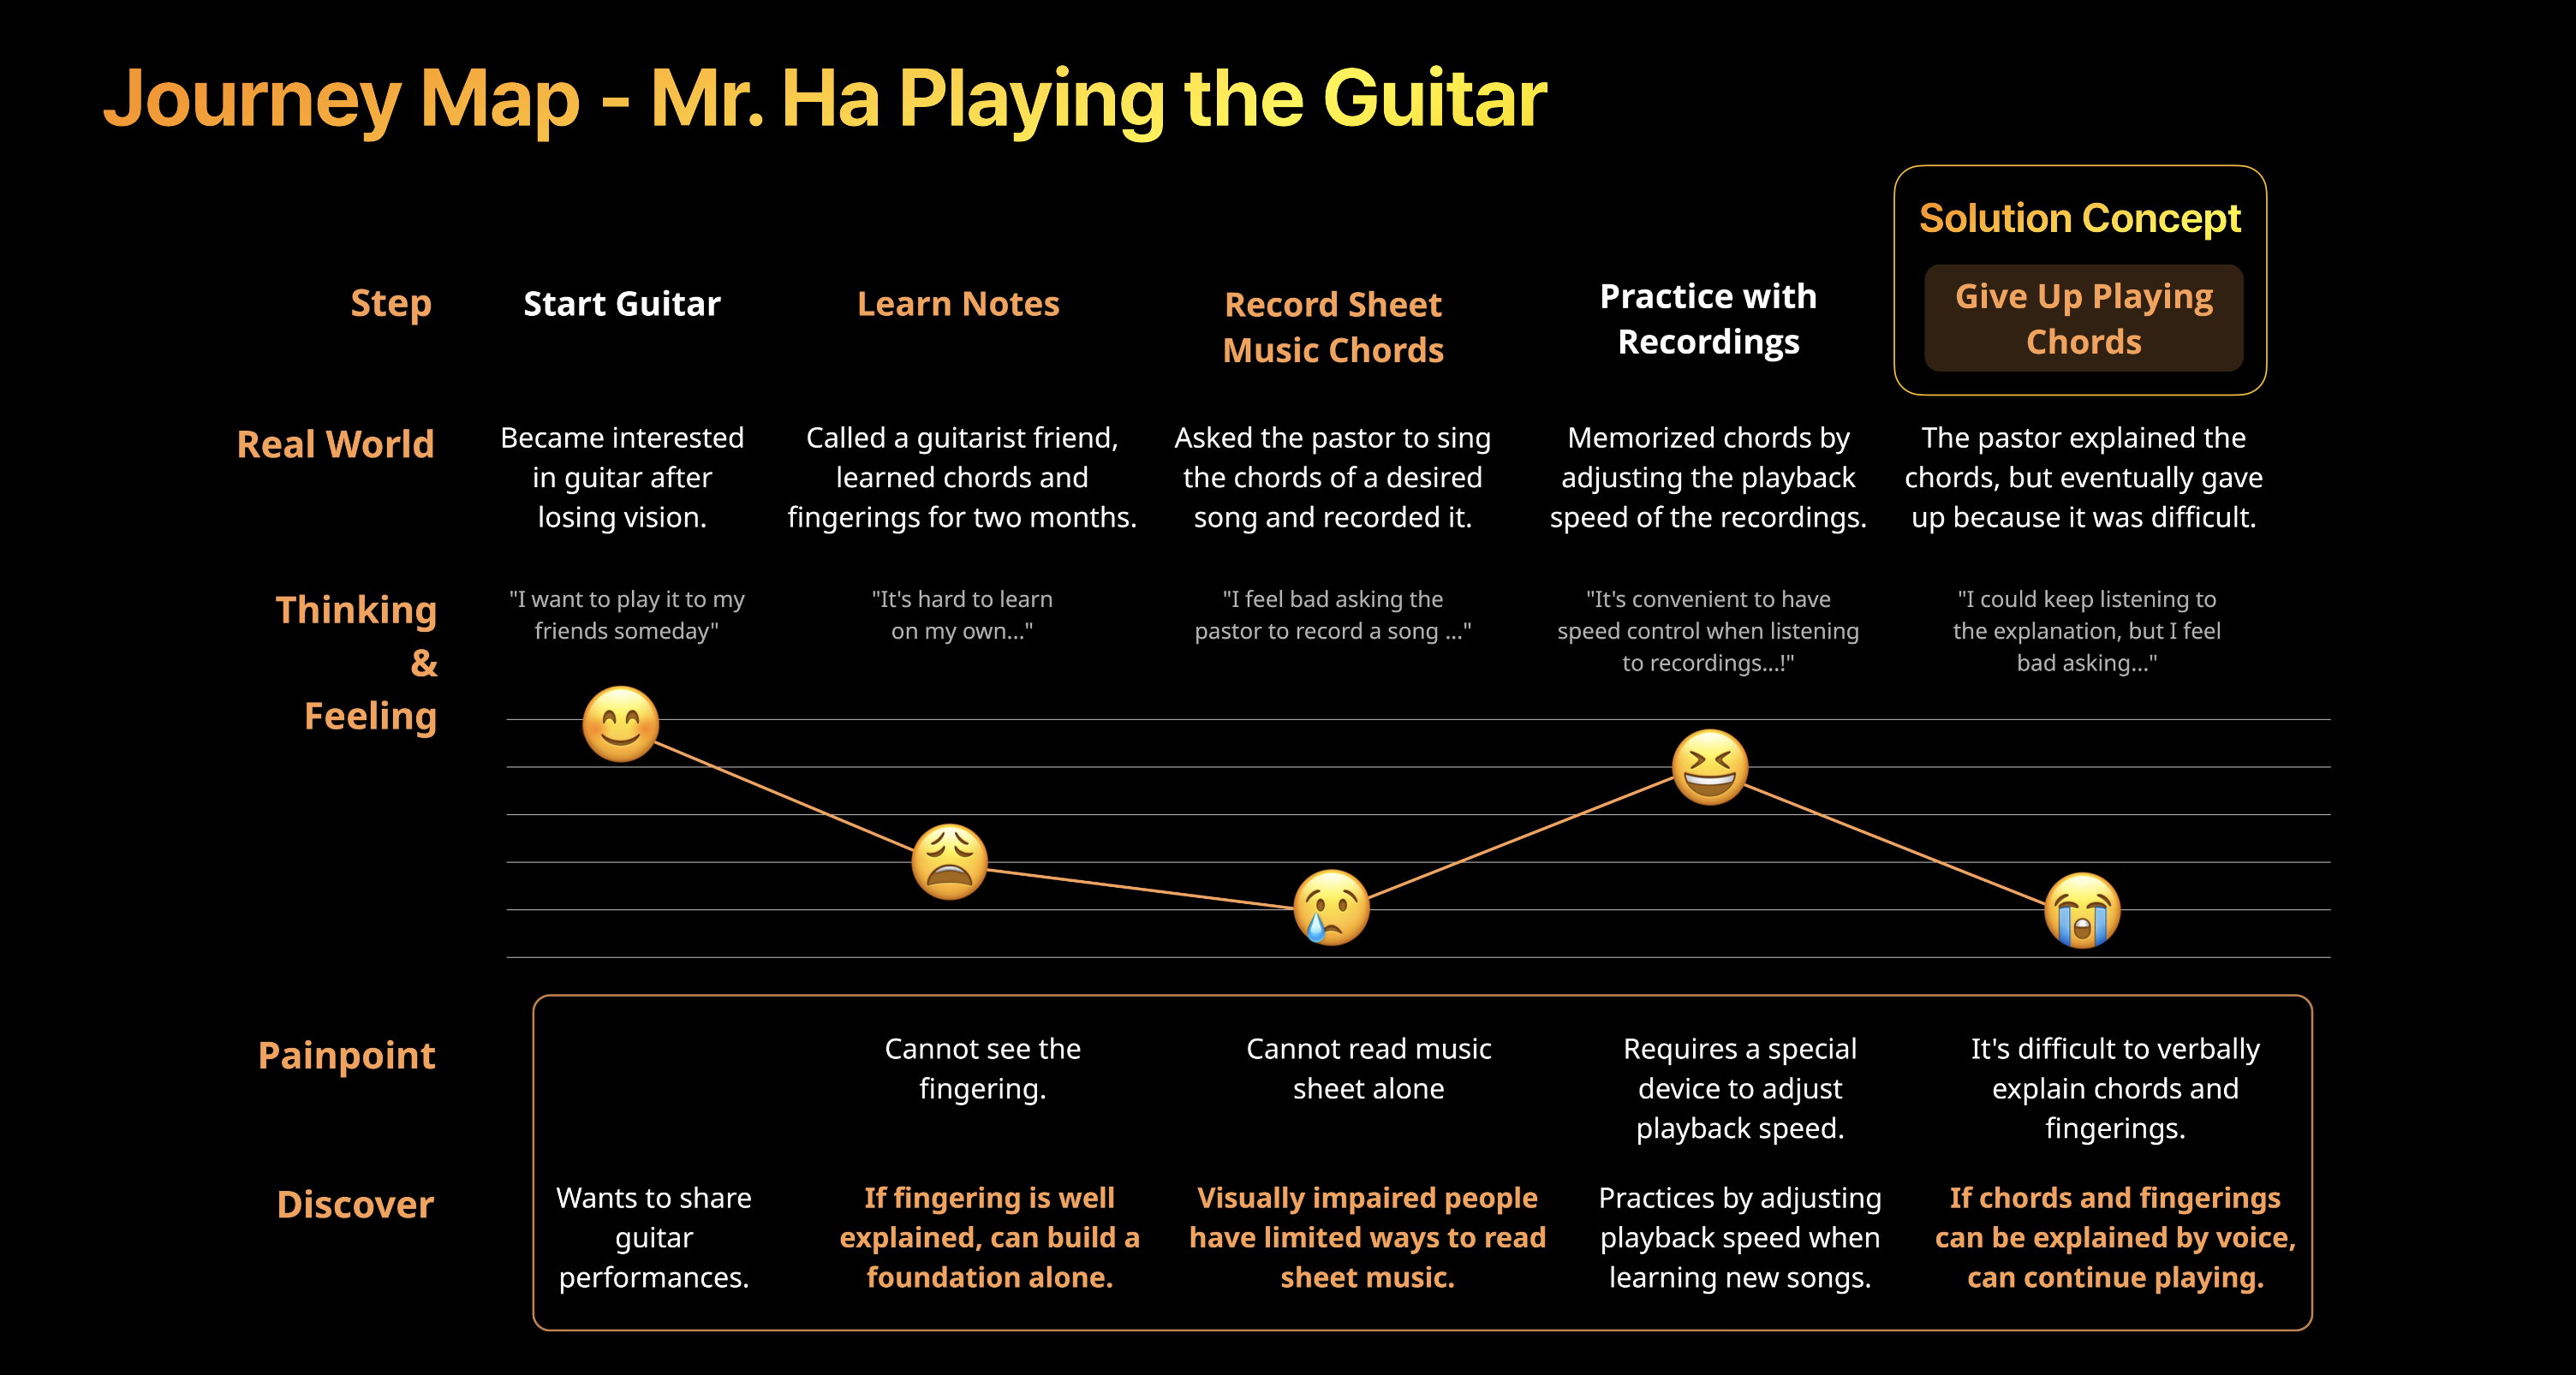 Mr. Ha's Guitar Learning User Journey
As a result of analyzing Mr. Ha’s guitar learning journey through interviews, the following problems were found.
- Core problem situation: Giving up learning midway due to the sorry feeling of having to ask people around him for chord fingerings every time
- Solution point: Provide a means for him to master and verify chord fingerings on his own without the help of others
Learning Guitar with Eyes Closed
At first, I didn’t realize how difficult it was to learn guitar chord performance without relying on sight. However, as a result of directly learning while wearing a blindfold, all team members were able to experience how difficult this was.
Playing guitar chords means knowing the chord fingering, knowing the playing technique, and knowing how to read the score. And if you analyze each element in detail, there is a lot of very detailed information.
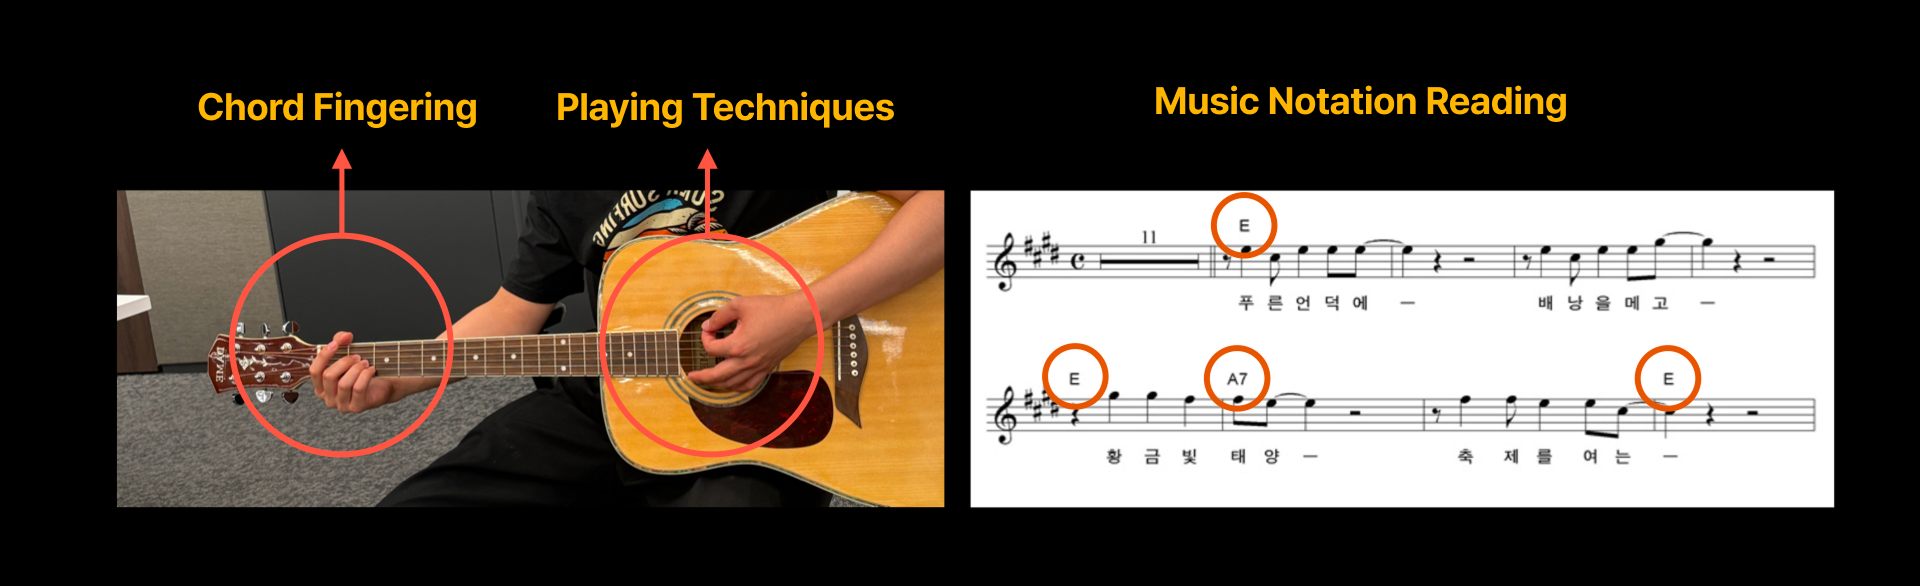 Guitar chord performance components
Even looking at simple chord fingerings, there are the following difficulties.
- Detailed positional information: Beyond simply catching ‘which string’, the minute positional difference within the fret determines the sound quality.
- Interference problem: It is difficult to perceive on one’s own the phenomenon where the finger catching one string touches the adjacent string and the sound is muted.
- Vastness of prior knowledge: Too much information such as finger number, string number, and fret position is poured out to explain a single chord.
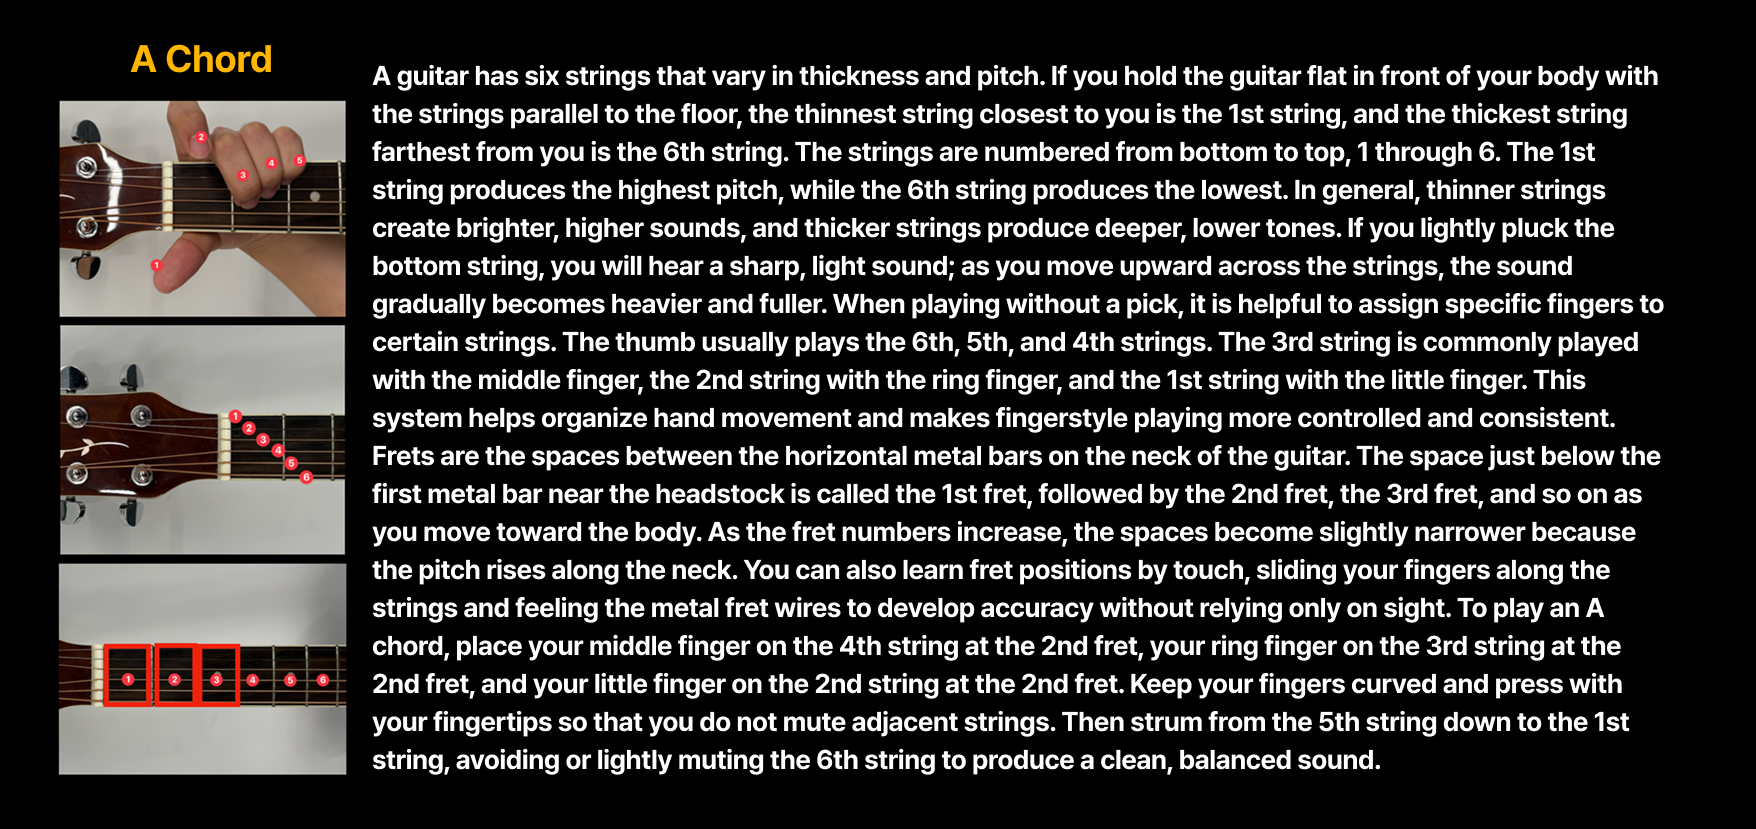 The vast amount of information required to explain one A chord
The challenges that visually impaired people must overcome to complete one song are summarized as follows.
 Difficulties visually impaired people face in learning the guitar
Our team set the final goal to enable the user to complete one song alone using voice guidance and real-time sound recognition technology.
Planning and Implementation
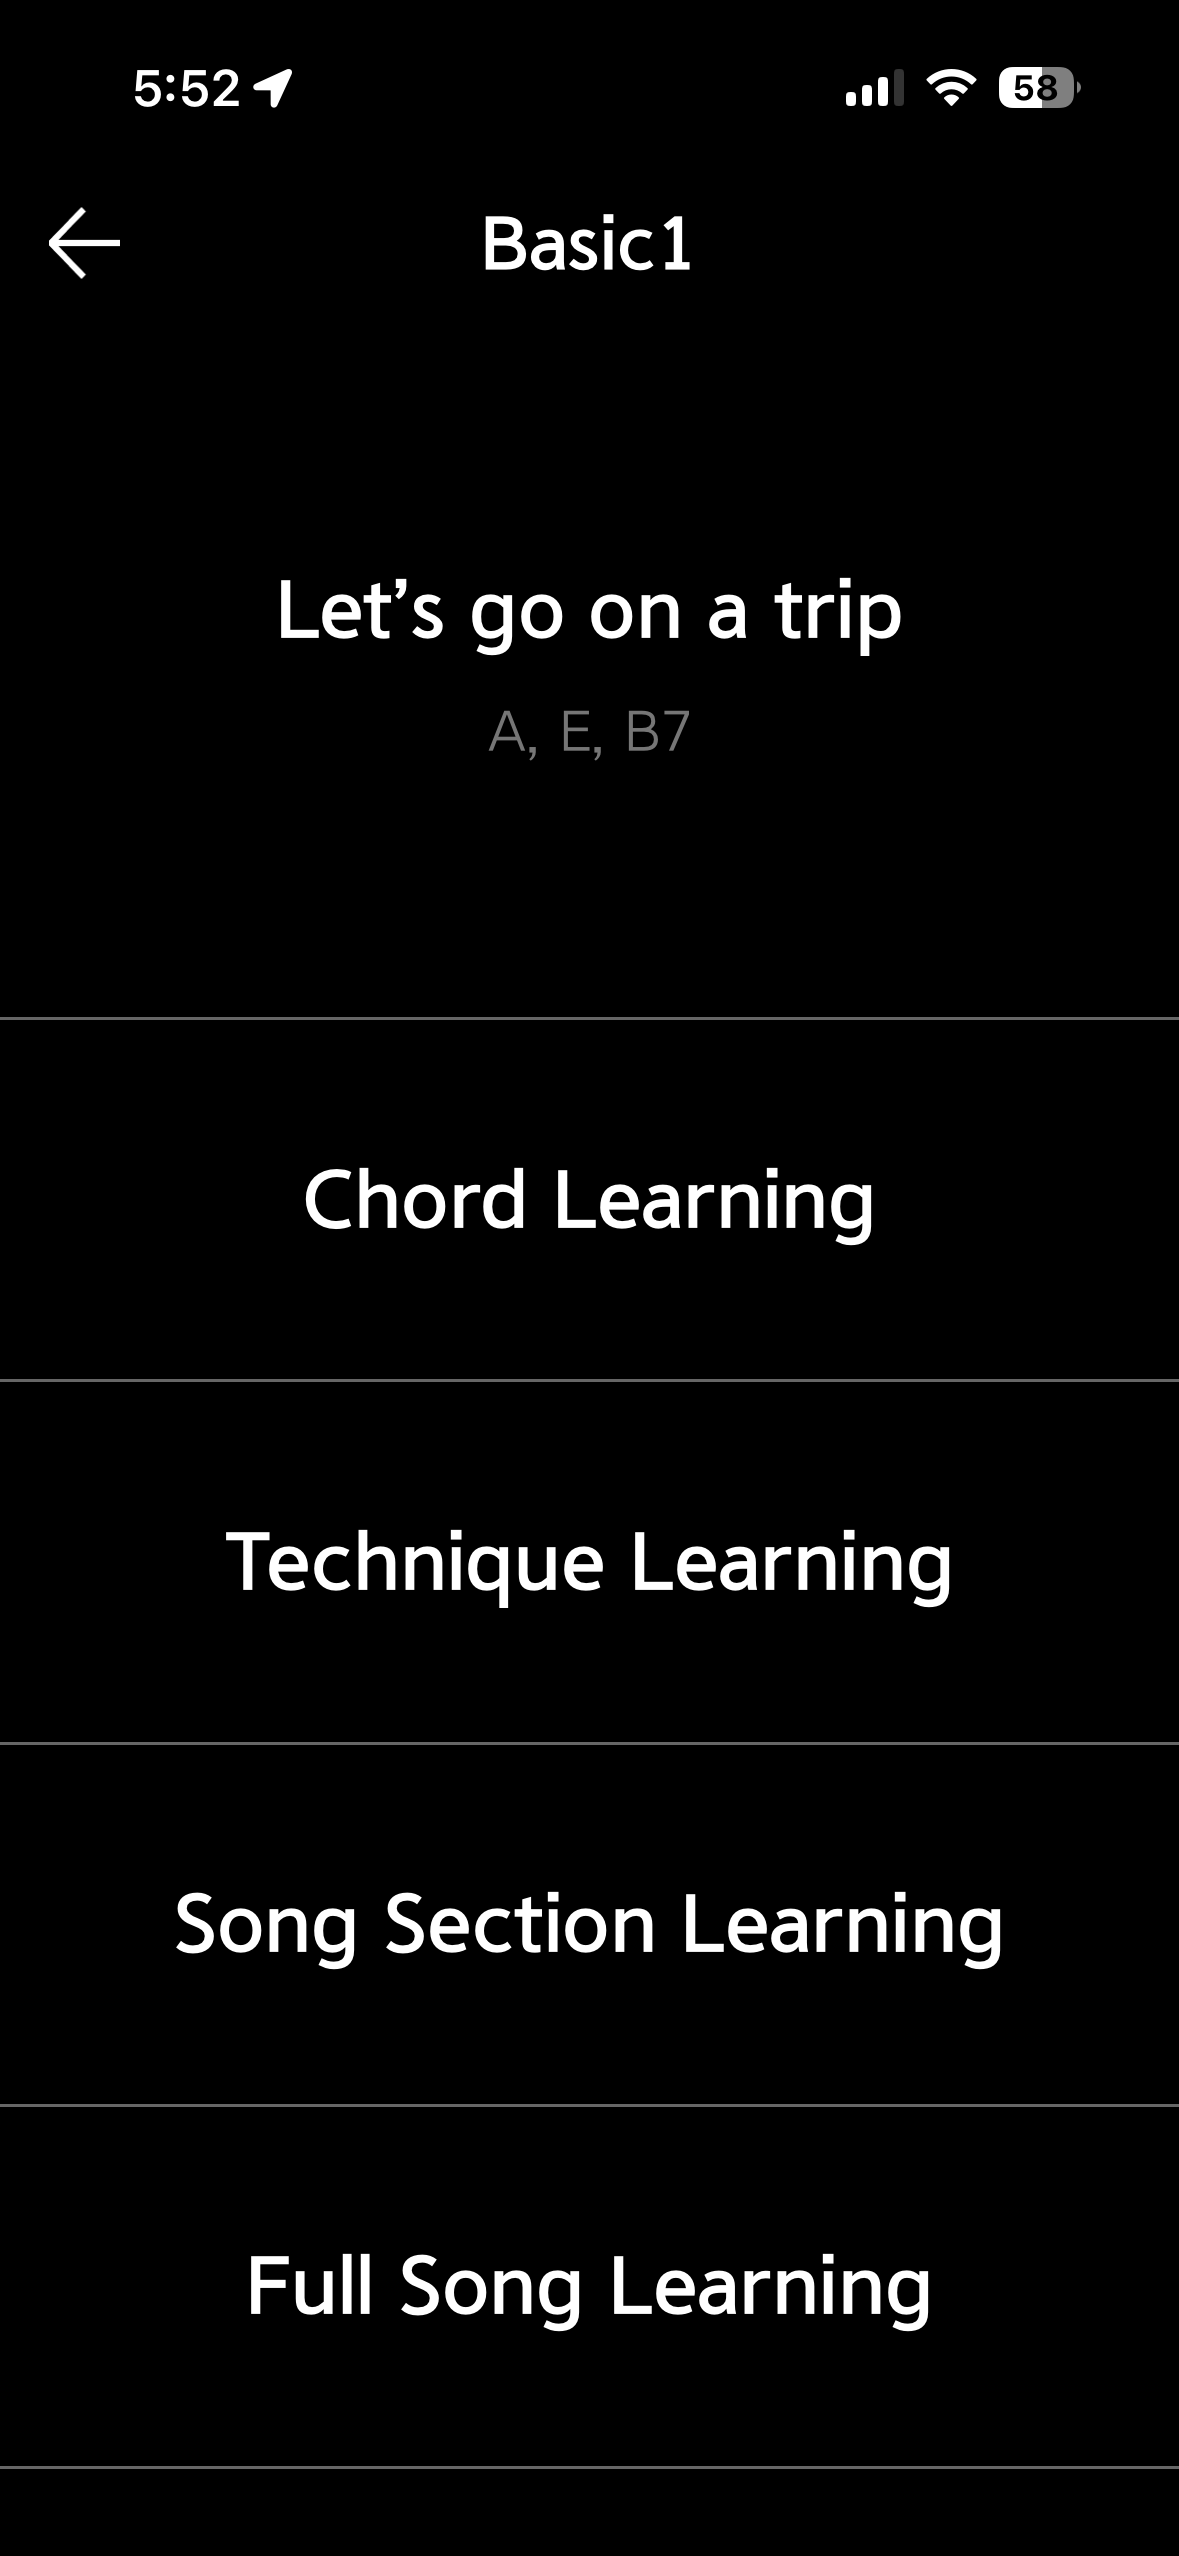 Learning screen
- Chord Learning: Acquisition of essential chord fingerings such as A, E, and B7
- Technique Learning: Mastering stroke and Calypso rhythm
- Sectional Learning: Breaking it down into 4-measure units
- Full Learning: Practicing the full song through speed adjustment
Chord Learning
First, you need to learn chord fingerings. To finger a single chord, you must know the finger, fret, and string number, and we explained it in the following flow.
- Explain the fingering in the order of finger number, fret, and string number.
- Check the sound by plucking one string at a time to see if it’s fingered correctly.
- Repeat steps 1 and 2 for all fingers that need to be fingered.
- Check the sound by stroking the whole chord.
We also implemented a correct sound verification function to check if the fingering was correct, and the detailed method will be explained in below.
Technique and Song Learning
Next, we implemented the right-hand stroke technique explanation and song learning function. There are also braille scores for visually impaired people, but since there are many who do not know braille, we implemented it to read the chords one measure before, and implemented a function to adjust the playback speed in the full song learning.
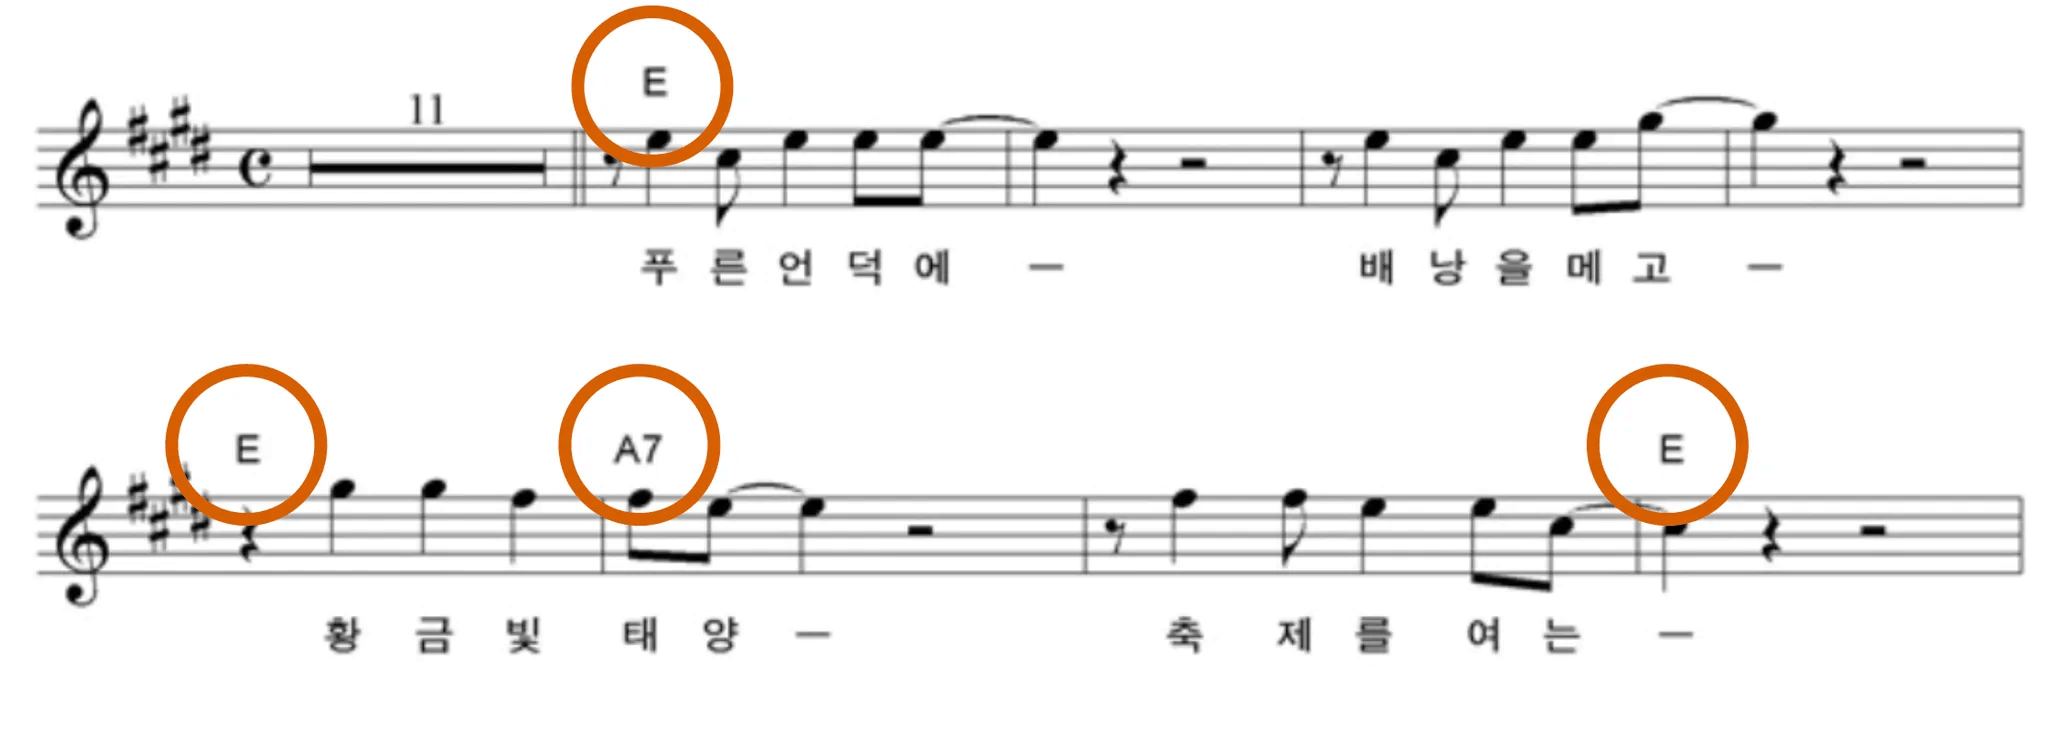 Part of the score for 'Let's Go on a Trip'
Sound recognition function implementation
Two technologies were applied to verify whether the user caught the chord correctly.
Note Classification
The function to check the sound of individual strings being plucked was implemented using FFT (Fast Fourier Transform). However, a problem occurred in identifying the octave due to harmonics overlapping in the low-frequency range, and this was corrected with the HPS (Harmonic Product Spectrum) algorithm to increase accuracy.
Chord Classification
The guitar chord classifier was implemented in two ways: cosine similarity method and machine learning method.
👉 Cosine similarity-based chord classifier source code
👉 Machine learning-based chord classifier Github
1) Cosine Similarity Chord Classifier
- Frequency analysis of micro-input with FFT algorithm
- 12-semitone activity analysis with Chroma Feature
- Chord classification by weighted sum of cosine similarity (70%) and Euclidean distance-based similarity (30%)
2) Machine Learning Chord Classifier
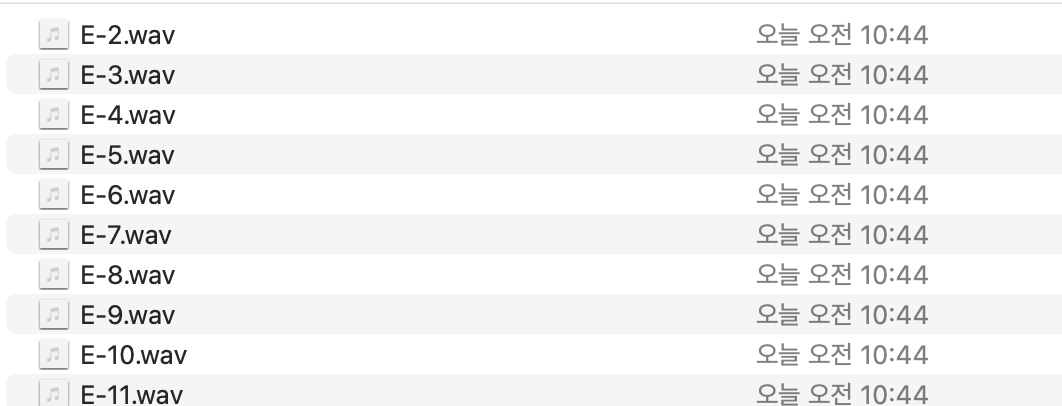
- Data collection: Directly recorded each chord 50 times.
- Labeling: Automatic slicing and labeling using Audacity’s ‘Sound Labels’ function.
See Audacity labeling details
Create one recording file where the chord is played 50 times at 1-second intervals.
After importing the recorded file to audacity, select the whole track (
Ctrl + AorCmd + A).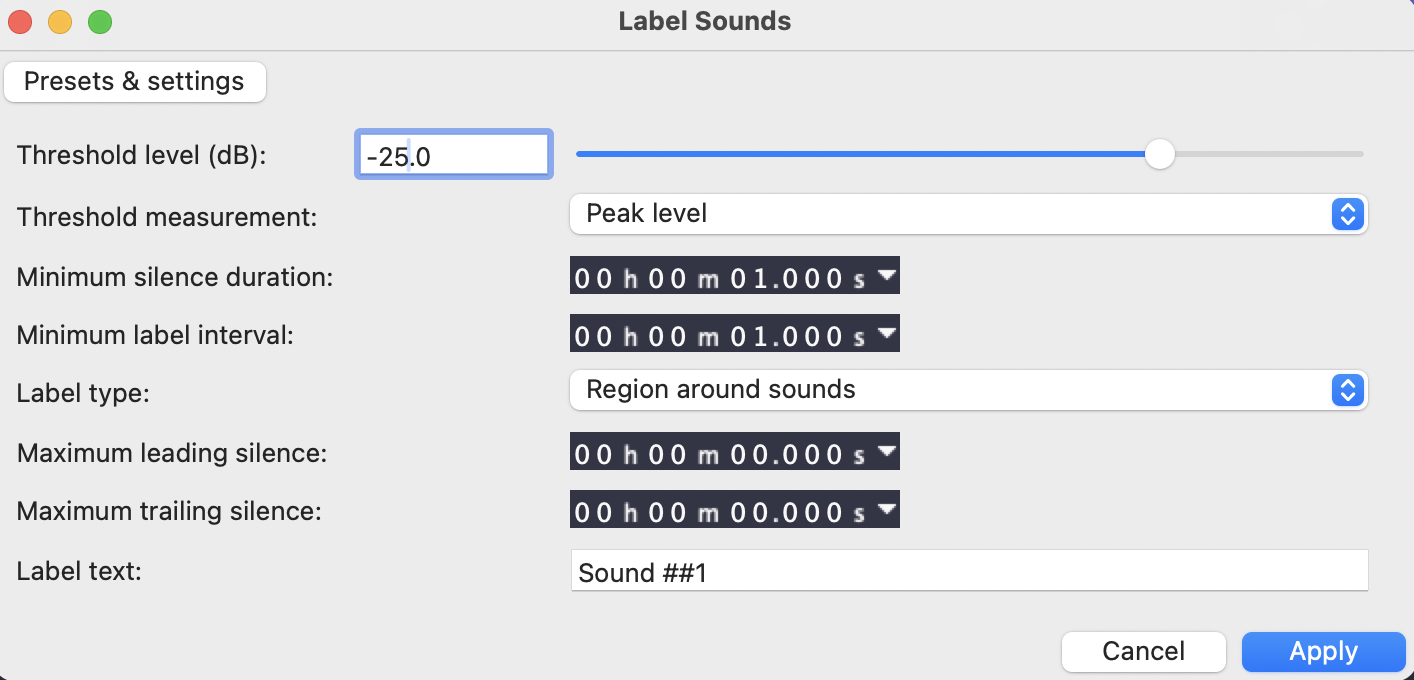
Select
Analyze→Label Sounds, adjust the threshold (dB) according to the recording environment, and apply.
Select
File→Export, and selectExport RangeasExport Multiple.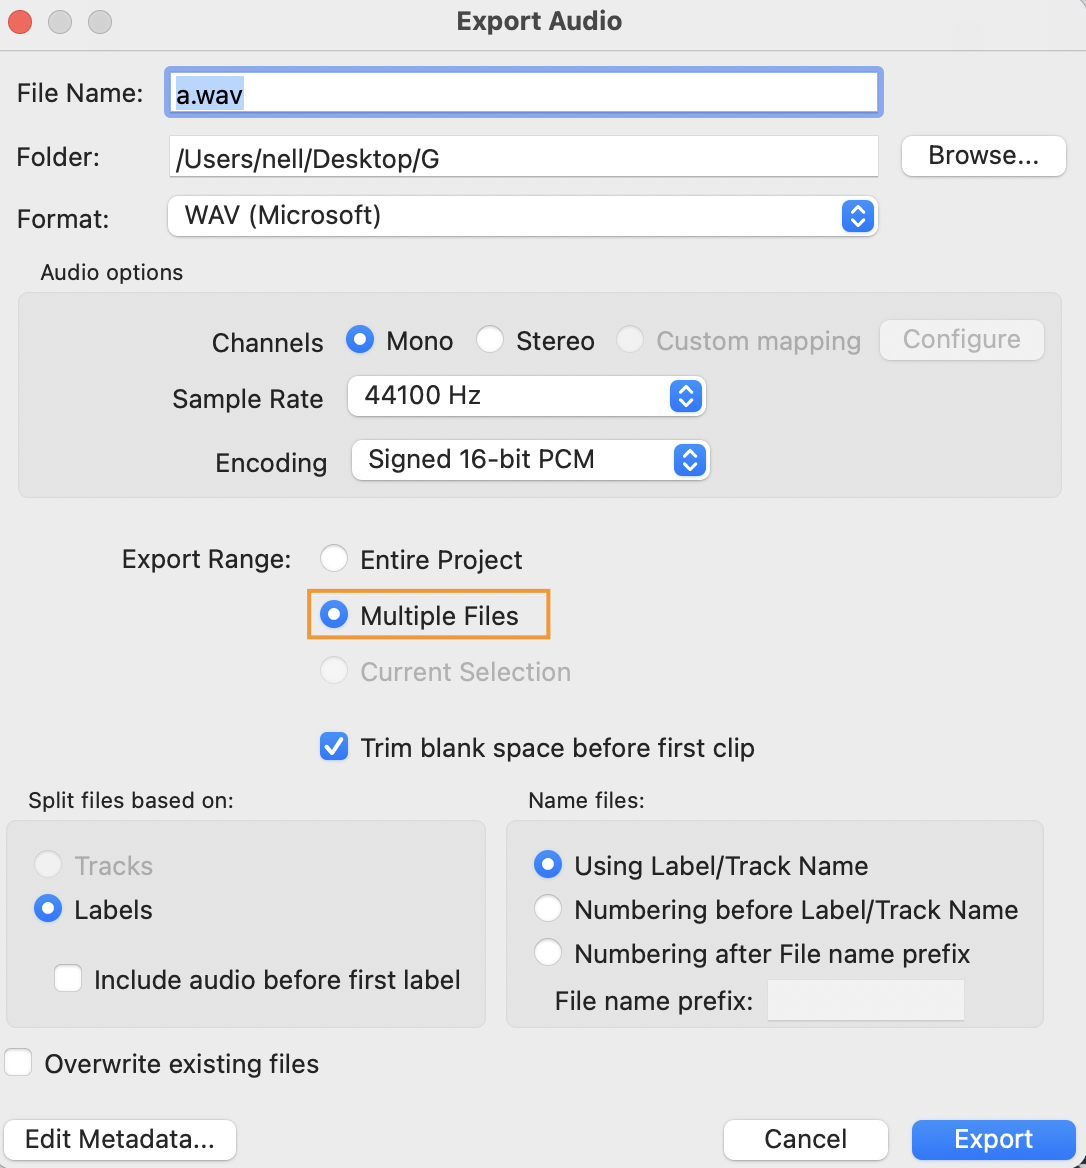
Files cut by section are created with labels.
- Preprocessing: Transformation into Chroma Feature which expresses the FFT result in a 12-semitone system.
- Model training: Training with CNN model to create h5 model
- Model conversion: Conversion of h5 model into mlpackage model with Coremltools
- App implementation: Added to Xcode, then implementing the same preprocessing code in Swift to run the model
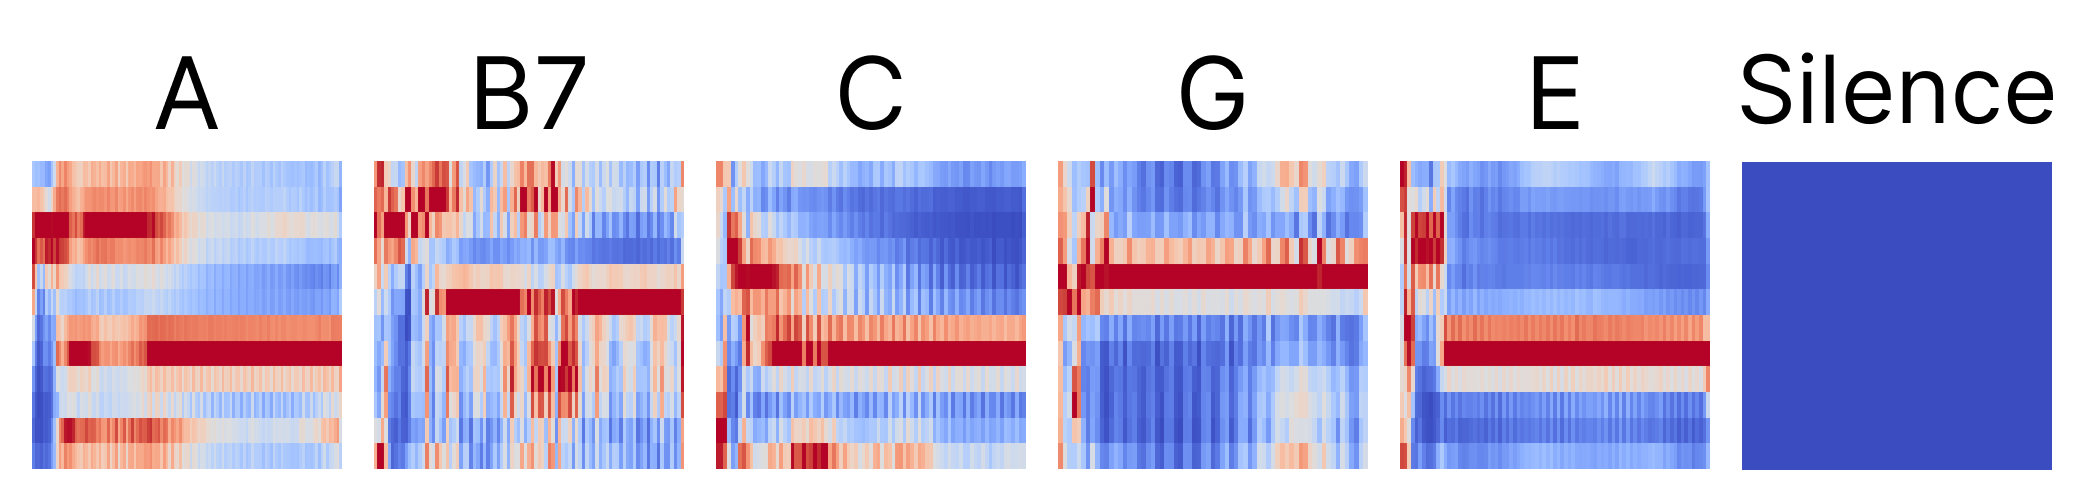 Chroma Feature analysis example
As a reference, to make a silence class, we also made audio files classified as Silence. When converting to Chroma spectrum, looking at the image, you have to add a noise gate so that nothing comes out in Silence mode as above to learn. The values extracted like this were trained with a CNN model to make a guitar chord classifier.
Accessibility
Accessibility was considered as top priority so that totally blind users can use the app without inconvenience.
Voice Over
Users with visual impairment use digital devices using screen readers. It is called Voice Over on iOS and TalkBack on Android. Since this project was developed in iOS, we will only deal with Voice Over.
1) How to run Voice Over
It can be found in Settings → Accessibility, and a basic Voice Over Tutorial is also provided.
When you first turn on Voice Over, it is not easy to turn it off because the usage is unfamiliar. In that case, request Siri to “Turn off Voice Over”.
2) Basic Voice Over usage
| Function | How to operate |
|---|---|
| Screen navigation | Short swipe left/right or move while pressing the screen |
| Element selection | Double tap |
| Screen curtain | Triple tap with three fingers |
| Move to home screen | Swipe up the bottom indicator until the sound is heard twice |
| Move to app switcher | Swipe up the bottom indicator until the sound is heard three times |
| View control center | Swipe down from the top until the sound is heard twice |
| View notification center | Swipe down from the top until the sound is heard three times |
| Exit current window | Swipe two fingers in a Z shape |
iOS has very well-implemented detailed accessibility functions that inform the state of the screen using sound.
3) Accessibility API
Various accessibility APIs are provided in Swift. Using these, you can specify the order in which Voice Over reads or the semantic unit of screen elements.
| Property | Explanation | Example |
|---|---|---|
| accessibilityLabel | Name of the element | “Back” |
| accessibilityTraits | Type of the element | Button, Header, Link, etc. |
| accessibilityValue | Current state of fluctuating element | Slider value, progress, etc. |
| accessibilityHint | Hint about what happens when manipulated | “Double tap to…” |
Voice Over reads in the order of Label → Traits → Value → Hint.
Sighted users basically recognize elements by grouping them through visual information such as blanks or borders, but for totally blind users who cannot use visual information, hide unnecessary elements so that Voice Over does not read them, and utilize the following accessibility APIs so that various texts in one button are read together as one element.
| Name | Explanation |
|---|---|
| .accessibilityHidden(_:) | Hidden so as not to read |
| .accessibilityElement(children: .ignore) | Completely ignore child elements and process only the container as an accessibility element |
| .accessibilityElement(children: .combine) | Merge child elements into one to make it read as one accessibility element |
| .accessibilityElement(children: .contain) | Container that groups children so that each child can be navigated |
4) Rotor
The Rotor is a function that changes the unit of the elements that Voice Over reads, and by using this, you can adjust the navigation options (character unit, word unit, line unit or header) and the speech rate without moving to settings.
The rotor can be used by placing the thumb and index finger on the screen and turning them clockwise or counter-clockwise to change the setting and swiping vertically.
If the rotor is set to a header, you can quickly navigate only the headers by scrolling vertically as in the video below. Header elements can be designated by setting the Traits to header.
Voice Control
Other than that, since the guitar is played with both hands in the app, it was implemented so that frequently used functions such as “Next”, “Stop”, and “Again” can be controlled by voice. The function was implemented utilizing SpeechRecognizer.
Demonstration
Finishing
We visited Mr. Ha again with the app developed with the team members for 5 weeks, and could see him learning chords and playing without the help of others. Although it was only implemented as a simple demo in iOS as part of the Apple Academy project, it was rewarding to see the app being used as planned.
Guita - Learning Guitar by Ear
👉 App Store
👉 GitHub - iOS & ML Repo
Next, the story of the guitar tuner made with Flutter for all visually impaired people who learn the guitar continues in Part 2.
👉 Go to see Part 2. Guita - Guitar Tuner for the Visually Impaired