CoreML은 애플의 머신러닝 프레임워크로, iOS 어플리케이션에 손쉽게 머신러닝 모델을 올릴 수 있도록 도와줍니다.
✔︎ 진행 순서
CoreML Tools를 이용하여 mlmodel 만들기
CoreML을 이용하여 iOS에 모델 올리기
CoreML Tools를 이용하여 mlmodel 만들기
CoreML을 이용하여 모델을 올리기 위해선 먼저 모델을 .mlmodel 형태로 변환해야하는데, CoreML Tools를 이용하면 손쉽게 변환 할 수 있습니다. CoreML Tools는 Darknet 포멧을 지원하지 않기 때문에 앞서 Darknet 모델을 Keras 모델로 변환하여 학습을 진행하였습니다.
CoreML Tools를 이용하여 keras 모델을 mlmodel로 변환
1
2
3
4
5
6
7
8
import coremltools
coreml_model = coremltools.converters.keras.convert('model_data/light_tiny_model.h5',
                                                    image_input_names='image',
                                                    input_names='image',
                                                    output_names=['13'],
                                                    image_scale=1/255.0)
coreml_model.output_description['13'] = '13 x 13 x 30'
coreml_model.save('model_data/light_tiny_model.mlmodel')
3부에서 학습하여 만든 Tiny YOLO 모델은 이미지를 13 x 13 Grid로 나누어 5개의 클래스에 대해 Grid 당 3개의 박스를 예측하기 때문에 13 x 13 x 30의 결과를 반환하기 때문에 위와같이 output을 설정해주었습니다.
// Rotate let rotatedImage = ciImage.oriented(forExifOrientation: Int32(CGImagePropertyOrientation.right.rawValue))
// Scale to YOLO input size let sx = CGFloat(ModelInputWidth) / CGFloat(CVPixelBufferGetHeight(pixelBuffer)) let sy = CGFloat(ModelInputHeight) / CGFloat(CVPixelBufferGetWidth(pixelBuffer)) let scaleTransform = CGAffineTransform(scaleX: sx, y: sy) let scaledImage = rotatedImage.transformed(by: scaleTransform)
// render : image into a pixel buffer. ciContext.render(scaledImage, to: resizedPixelBuffer)
// Model Predict predict(image: resizedPixelBuffer) }
이렇게 가공된 이미지를 model.prediction 함수에 전달합니다. output._13은 CoreML Tools를 이용한 mlmodel 변환시 입력한 output_names=['13'] 입니다.
// 13 x 13 x 30에 해당하는 결과 찾기 if observationsIndex == nil { for (i, observation) in observations.enumerated() { guardlet feature = observation.featureValue.multiArrayValue else { continue } if feature.count == featureCount { self.observationsIndex = i break } } } if observationsIndex != nil { iflet output = observations[observationsIndex!].featureValue.multiArrayValue { computeBoundingBoxes(features: output) } } }
Vision framework를 이용한 이미지 전처리
1 2 3 4 5 6 7
funcgetResizedPixelBufferByVision(pixelBuffer: CVPixelBuffer, request: VNCoreMLRequest) { // orientation 옵션에 .right를 주어 오른쪽으로 회전 let handler = VNImageRequestHandler(cvPixelBuffer: pixelBuffer, orientation: .right)
// 수행 완료시 visionRequestDidComplete()를 호출 handler.perform([request]) }
output은 각 grid당 13 x 13 x 30 크기의 MLMultiArray 타입의 결과로 computeBoundingBoxes() 함수로 전달하여 결과에 대한 후처리를 진행합니다.
funccomputeBoundingBoxes(features: MLMultiArray, featureCount: Int) -> [Prediction] { var predictions = [Prediction]() let blockSize: Float = 32 let gridHeight = 13 let gridWidth = 13 let boxesPerCell = 3 let numClasses = labels.count
let featurePointer = UnsafeMutablePointer<Double>(OpaquePointer(features.dataPointer)) let channelStride = features.strides[0].intValue let yStride = features.strides[1].intValue let xStride = features.strides[2].intValue
for cy in0..< gridHeight { for cx in0..< gridWidth { for b in0..< boxesPerCell {
let channel = b*(numClasses + 5) // Grid 상의 x, y 위치 let tx = Float(featurePointer[offset(channel , cx, cy)]) let ty = Float(featurePointer[offset(channel + 1, cx, cy)])
let tw = Float(featurePointer[offset(channel + 2, cx, cy)]) let th = Float(featurePointer[offset(channel + 3, cx, cy)]) let tc = Float(featurePointer[offset(channel + 4, cx, cy)])
// 박스의 중심좌표 (x, y) let x = (Float(cx) + sigmoid(tx)) * blockSize let y = (Float(cy) + sigmoid(ty)) * blockSize
// 박스의 with, height let w = exp(tw) * anchors[2*b ] * blockSize let h = exp(th) * anchors[2*b + 1] * blockSize
guardlet hitTestResult = hitTestResults.first else { returnnil } let translation = hitTestResult.worldTransform.translation // 3차원 좌표 let x = translation.x let y = translation.y let z = translation.z
returnSCNVector3(x, y, z) }
실시간 조명 설치 및 해제
이번 프로젝트의 YOLO Model은 총 5개의 클래스를 학습하였습니다. 그 중 램프와 전구는 ON/OFF 상태를 구분할 수 있도록 별도의 클래스로 구분하였기에 조명의 상태를 추적할 수 있습니다.
YOLO Model이 학습한 Class
매 프레임마다 Model이 현재 프레임상에 존재하는 조명의 위치와 종류를 예측하는데, Bounding Box의 중심점이 다음 연속한 3프레임의 Bounding Box속에 존재하면서 동일한 클래스를 예측하는 경우, 해당 클래스에 해당하는 조명이 실제한다고 판단하여 행동을 취하도록 구현하였습니다. 예를들어 3회 연속 ON 상태의 조명을 인식하면 해당 위치에 SCNLight를 설치하고, 반대로 OFF 상태의 조명을 인식하면 해당 마지막 Bounding Box속에 존재하는 SCNLight를 삭제하였습니다.
YOLO 조명 on 상태 인식
YOLO 조명 off 상태 인식
화면상에 노란색 구슬은 SCNLight 설치여부를 볼 수 있도록 시각화한 가상 오브젝트입니다.
마치며
처음엔 CoreML을 이용하여 YOLO Model을 올리면 끝날 줄 알았는데, Model의 input과 output에 대한 처리에 대한 부분이 생각보다 힘들었습니다. 😭
이상으로 딥러닝을 이용하여 더욱 현실감 있는 AR 앱 만들기 4부작을 마치도록하겠습니다. 🎉 긴 글 읽어주셔서 감사합니다.

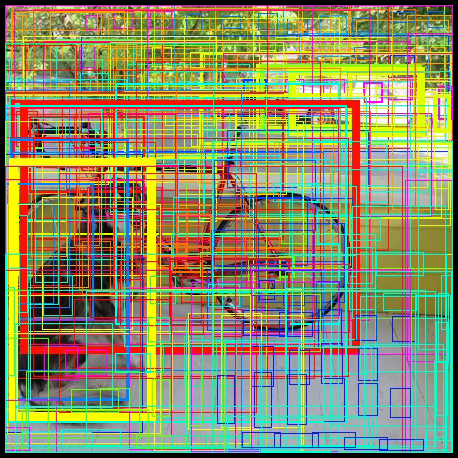 YOLO output을 나타낸 이미지
 YOLO output을 필터링하여 나타낸 이미지
 CGRect 구조
 YOLO Model이 학습한 Class